So- Sourdough!

So apparently, sourdough is trending since so many are in quarantine.  (Quarantine kitchen- seriously, go check out @ManitowocMinute.)  I hope everyone stays healthy!  It makes sense- homemade bread is so delicious, and it’s not too difficult to make.

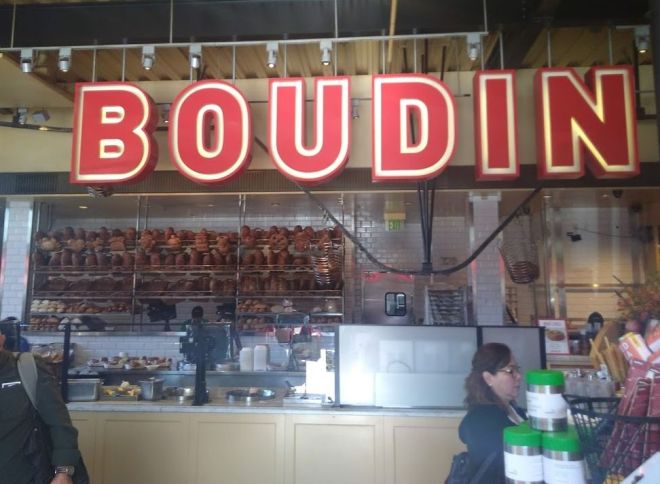
Around the time this first started, I thought I’d give making a sourdough starter a try.  Last fall, we were able to travel to San Francisco with friends and, as part of our trip, have some sourdough at the renowned Boudin Bakery.  Pure excellence.  We were able to see their museum/restaurant and hear the story about how their starter was saved from disaster- but that’s another post.  That’s also where we had the idea to try their chocolate sourdough.

boudin

I’m certain I was not able to recreate quite the same as Boudin’s storied and specialized San Francisco sourdough, but we did get our own starter going, and were able to make some different recipes with it here in Wisconsin.

Apparently, it is a trend to name sourdough.  I asked our son what we should name it, and I had thought he had said “I don’t know.”  Actually, he meant and clarified “Doughn’t know”- I thought that was pretty witty and astute for a little kid.  He loves to cook and help me make bread, so he’s been involved in all of the steps in all we’ve tried.

First, we needed a recipe for starter, and thought we’d give this one from Taste of Home a try.  It worked out well.  We were able to get a starter going quickly, and only tossed the first portion we removed in the first week since I had read that it likely was not strong enough to raise the dough.  We have been baking successfully ever since.  I’m not someone who is going to bake something every day or want to babysit a starter, so the recipe has worked well to store in the the refrigerator when not in use.  We still followed the directions to feed it once a week.  I won’t re-hash all the recipe specifics, or this will get to be a REALLY long post (please review the links!)

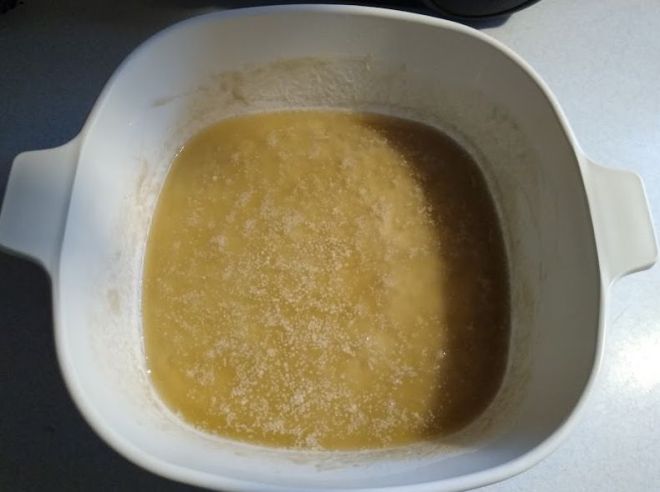
Here is the mixed starter:

starter mixed


Starter direct from the fridge, prior to feeding/mixing (notice the liquid on top):

starter fridge

We found several good recommendations for making sourdough bread from this very helpful website- The Clever Carrot:

Always smell the sourdough starter- just to make sure it still smells yeast-y and bread-like.  When baking, I would have just put the dough on our pizza stone, but the Dutch oven works fantastically well.  It helped to ‘work in reverse’ for timing- plan out the amount of time needed to warm/feed the starter, let the bread dough rise, and then rise again before baking it.

We tried the bread recipe from Tasty.

We did use cornmeal on the bottom of the pan, which helped give the bread crust a nice crunch.  It worked better (easier to clean) by using parchment paper in the Dutch oven and put the cornmeal/dough on that.  Definitely score the bread on top so the steam can escape in a specific spot.

bread in Dutch oven


The fresh bread smells so good, but it is important to let it cool and wait about an hour.

One week later…starter in the fridge, and then re-fed.

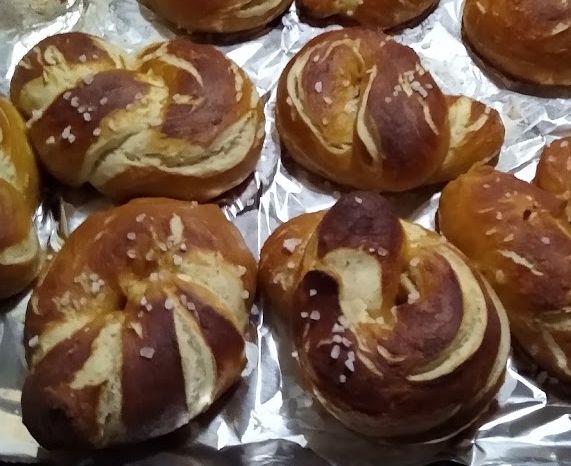
After we tried regular sourdough, we tried making pretzels:

We did not prepare the egg wash, but they were still fantastic!

pretzel mix

pretzel dough

pretzel dough shaped


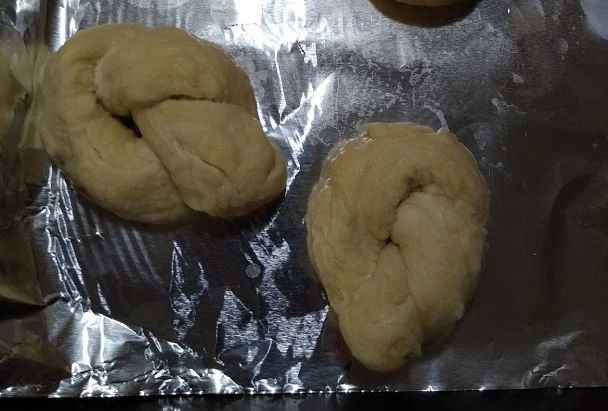
(Please forgive our non-standard pretzel shapes- still delicious when cooked!)  They were best as pretzels fresh, but great as burger buns the next day!

pretzels


Another week later, we tried chocolate sourdough!


chocolate mix

chocolate dough

chocolate dough rise

chocolate sourdough

chocolate bread cut


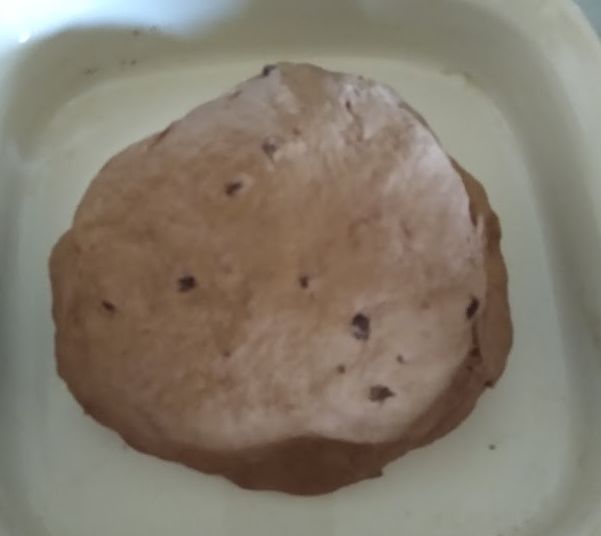
There was no separate recipe, just my estimate/guess-timates.  I used the Tasty recipe from above (and let the dough rise twice), and added 2 tablespoons of regular cocoa powder and 2 tablespoons of dark cocoa powder to the mix before adding the sourdough starter.  I also added half a cup of mini semi-sweet chocolate chips.  We didn’t add sugar to the recipe- there’s no sugar in the recipe, so next time, we might try adding more cocoa powder (maybe another tablespoon each and/or another half cup of chocolate chips).  This would make it 3 tablespoons of each cocoa powder and 1 cup of mini semi-sweet chips.  Regular size chocolate chips may work as well, but we have not tried it.

Next on the list may be sourdough pizza crust… The tour of deliciousness continues…

If you’ve made a starter, what have you made?

‘Super Bowl’ Spaghetti Squash – Fritters

It may not be typical Super Bowl fare, but it’s still Super delicious!

Are you tired of plain, regular baked spaghetti squash with pasta sauce?

Do you want to try something as good or better for your garden-grown or supermarket-selected spaghetti squash?

We made these Italian-Style Spaghetti Squash Fritters- recipe.  (Recipe via Oh My Veggies)

We made four batches of this recipe from one spaghetti squash, but that, of course, would vary by the size of the spaghetti squash.  (And you can also roast the seeds separately in the oven for a snack too!

It was very easy to mix up, and they were easy to fry, though it took a little to have them done on both sides.  It helped to flatten them a bit with a fork when placing them in the pan.  We ran out of ricotta on the last batch, so we swapped in some cottage cheese, which worked well.  They turned out nicely crunchy and were flavorful- the garlic, cheese, and herbs were noticeable just by themselves.  They’d make an excellent substitute/side in place of potato pancakes.

We thought they’d also be perfect with some cumin and cilantro in place of the Italian herbs/seasoning, and then they could be topped with salsa instead.  They could also be good with curry powder in place of the Italian herbs/seasoning.

Enjoy (for the Big Game, or anytime)!


Eat well, my friends!

Well, it’s the Super Bowl again, and while my team is not playing, and we’re not having a party, it’s not a bad day to plan a quality meal.  We had some beef tenderloin in the deep freezer, some Jones Farm bacon and thought a crock pot meal might be the way to go as an alternate to grilling in the cold and snow.  (Thankfully, it’s stopped snowing.)  I came across a recipe for a crock pot beef tenderloin via A Spicy Perspective:

(Check out the recipe card for the directions and ingredients.)

Recipe card: https://www.aspicyperspective.com/beef-tenderloin-recipe-balsamic-glaze/2/ 

Process: https://www.aspicyperspective.com/beef-tenderloin-recipe-balsamic-glaze/

While mine didn’t end up looking the same, it still smells heavenly!  (Final pictures to follow once it’s done!)

I seared mine in a cast iron pan- cast iron is starting to grow on me, and it’s not hard to clean.

beef tenderloin w bacon in a cast iron skillet

A pile of onions and garlic ready to go in after the crock-potting of the tenderloin:

onions and garlic next to a crock pot

The tenderloin getting ready to begin its slow cooking- with the bacon juices marinating from the top!

We have a rosemary plant indoors that’s liking the window well enough, so thankfully, we had fresh rosemary.

roast with onions, garlic, bacon, and rosemary

After cooking a while, I added the remaining ingredients, but realized I was almost out of balsamic vinegar… But, no worries- you can make a substitute with red wine vinegar (which, thankfully, we have- no emergency trip to the store this time!)  I used the last of the balsamic I had and filled in the rest with my substitute.  It smells great so far- we should be eating during the game.  (Finished product photo to follow!)  Eat well, my friends!  (Verdict: delicious!)

Saving Seeds with Seed Libraries

If you live in a locale where winter has settled in with its icy grip for the next few months, what’s a warm-weather-loving, green-seeking gardener to do (besides enjoying the houseplants)?  Maybe check out your local seed library… While the concept been around for a little while– some part library, somewhat seed bank, it provides a means to share rare and heirloom seeds locally and make them more available.  It’s not without controversy, as some companies have moved to protect plants that they see as their property.

2014_seed_library_usa_15210065125

(Image from Wikipedia via https://www.flickr.com/people/10293577@N03- unedited; size reduced)


Poisonous Plants (Wild Parsnip)

Wild Parsnip (via DNR)

Wild Parsnip (via DNR)

I had previously been aware of Giant Hogweed‘s dangers, and noted when it was reported in Wisconsin recently.  Certainly glad there was none of it around here, and then I found wild parsnip!  Same theme; different plant.

This strikes a little closer to home- literally.  I found a few plants in our yard, thankfully in an easy to access area from all sides.  I don’t recall hearing anything about the plant up until now, and I don’t remember seeing it growing anywhere from when I was a kid.  Other than the small patch of plants, it’s not close to our area that I’ve seen, but we don’t have to go far to see whole ditches and edges of fields full of it.  The DNR and local media have shared more information now that the plant is in bloom with the summer season.

It looks fairly innocent, almost like tall dill!- nothing that would suggest that precautions are needed to deal with this thing.  Mainly, my concern is for friends, family, and their kids who visit our place.  It seeds like crazy, and the sap causes burns on skin in conjunction with sunlight (cloudy weather doesn’t make it safer!)

I’ve taken precautions to eliminate this noxious greenery– unfortunately, I didn’t catch it sooner.  I’ve taken steps to kill the weeds at the roots, and dressed appropriately to remove and burn all the seedheads.  Thankfully, it all was still fairly green, so I think we got to it in time before seed dispersal.

I’m not sure how it traveled to our yard since there’s not much else close around.  Perhaps via creature travel… Watch out in your own outdoors and adventure safely to save yourself some trouble!

Grilling…

grill with fire

Lit grill (from Wikipedia commons)

There’s nothing quite like grilling out, and one recipe that has turned asparagus-haters into asparagus-lovers in my family is grilled balsamic asparagus.  There are quite a few tasty yet simple variations available online.  Mine is as follows; amounts are determined by the amount of the veggie you are making.  The coriander provides a citrus-y zing that goes well with the balsamic.

This recipe is easy to make in a skillet/wok, though flame grilling provides a better flavor, IMHO.

To prepare the spears, it’s not required to trim them with a knife or peel them.  You can snap the spear in two towards the bottom (the more fibrous part will separate from the more tender part naturally).


Grilled Balsamic Asparagus

Bunch(es) of fresh asparagus spears

Olive or vegetable oil

Balsamic vinegar

Salt

Pepper

Coriander (crush the seeds with a mortar and pestle or use powdered coriander)


Rinse and prepare asparagus (as noted above).  Put all ingredients into a sealable plastic bag and set in a baking pan (in case the bag leaks).  Refrigerate and marinate for at least 1 hour, mixing at least once or twice, so all spears sit in the mixture/are coated well.  Grill until the spears are cooked to desired doneness, rotating as needed.  (I prefer to cook them until darker green, but not so much that they are mushy.)  Serve hot.

Enjoy!

(And watch for grill flare-ups due to the oil; make sure to grill safe!)


Vegan/Vegetarian Pulled ‘Pork’ (Spaghetti Squash)

We had some remaining spaghetti squash from this year’s growing season, (it’s December, and they keep really well!) and had just had the classic spaghetti-squash-with-spaghetti-sauce iteration recently, so we wanted something different (and simple!)

I stumbled across the original recipe idea: http://greatist.com/eat/recipes/barbecue-spaghetti-squash-pulled-pork-tacos, but wanted something even simpler than that.  A crock pot beckoned.


Ingredients:

1 or 2 spaghetti squash (depending on size, may need more if smaller squash)

Coconut Oil

Cumin


BBQ Sauce (I used a bottle of Sweet Baby Ray’s: http://www.sweetbabyrays.com/ but use whichever you like, or make your own)

1 large onion

2 cloves garlic

Salt and pepper to taste


Cut squash length-wise and remove seeds. Remove the stem end. (You can make and snack on roasted squash* seeds** while you are waiting for this to cook!)   Put aluminum foil in a baking pan large enough for squash (use a pan with sides). Rub coconut oil on cut sides and in center of squash halves.   Sprinkle cumin over all and put cut side facing down, onto aluminum foil. Bake halves at 350 for at least 45 minutes, until squash is tender- check with a fork. (It should string out like spaghetti from shell.) More baking time may be needed; it will depend on the size of the squash.


Put 2 cups of water in crock pot. Mince onions and garlic and add to crock pot. Add half of squash to crock pot and top with BBQ sauce. Add remaining squash and top with more BBQ sauce. Follow crock pot directions (can be on low or high setting).   Stir halfway through cooking time.   Add more BBQ sauce to taste. Let cook with crock pot cover off for a little if mixture is too watery. Serve on rolls/buns.

recipe in crock pot


Crock-potting it up!


recipe plated with rolls


Post-crock.


Feedback:  The cumin gave the squash a nice deep flavor, and the BBQ simmered down to be very rich and robust. We would definitely make this again.  We froze some for later use.

Some family members said they liked this better than actual pulled pork because it was not fatty.

The squash (not altogether unexpected) was maybe lighter than my hardwired-for-pulled-pork brain was expecting.  Next time, I may add a few lentils to cook in the crock pot with the mix to add a little more heartiness to the dish/make it more toothsome.  I’d have to watch the liquid levels, though, just so nothing dries out.

*                                                                   *                                                            *


*Yes, these squash seeds will work too- move over, pumpkin!

**Additional recipe for roasted squash seeds: Check out the link, or use my way- cover a pan with parchment paper- no butter/oil needed.  Add squash seeds (no need to rinse, though you may want to pick out any random squash strands).  Shake your favorite seasoning over seeds.  Salt, if desired, or a no-salt seasoning works just fine too.  Stir and season again.  Bake at 350 for 10 minutes.  Remove from oven and stir.  Add more seasoning if desired.  Bake another 10 minutes or until seeds have completely dried (the seasoning will dry/adhere to the seeds).  Enjoy!

So Much More Than Cake!

Oliver's Bakery sign with sunset

(Photo from Oliver’s website: http://oliversbakery.com/)

One of the businesses that I truly wish we had in our town is a bakery; sadly, the one that was here closed before we even moved here.  Regardless of our town’s bakery-having-or-not status, we make a point to stop at Oliver’s when we visit Kenosha- and for good reason.  I was initially introduced to Oliver’s goodness via my wife’s recommendation.  While their doughnuts are some of the best quality I have had, they offer a robust selection for those sweet options, as well.  It is the perfect place to visit if you are looking for the classics, but also if you want to consider something less common (they have custard filled, but also are purveyors of a tasty peanut butter and jelly doughnut).  I’ve had several doughnuts, and they are always fresh and flavorful.

Oliver’s is more than just exceptional doughnuts.  We’re also fans of their muffins- there’s a similarly delicious wide selection here also.  I’ve had Kringle from a few different vendors, and I can write with certainty that theirs is also among the best.  Particularly, they have plenty of filling (some other Kringles are rather light on this… and someone should not have to think to discern a Kringle filling or flavor!  Certainly not a problem here- delicious!)

Our recent visit was on a Friday, and we were surprised to note that they also had fried fish and shrimp.  While fish fry in Wisconsin is definitely not a surprise, availability at a bakery definitely was.  While we were there selecting our purchases, several customers came in to pick up both fish and shrimp. Upon noting this to my wife’s parents, we were told that an uncle was known to have driven for hours to get their fish fry.  Oliver’s website (corroborated by my wife’s parents) notes that this has been available for quite a while.  I will have to give it a try next time we are in on a Friday.

In addition to our typical doughnut purchase, we decided to try one of their pies in the refrigerator case- a pecan pie.  It truly was an excellent choice.  The crust was flaky, and the filling was a perfect sweet complement to the nuttiness of the pecans- without being too sweet (an issue I notice quite often with an average pecan pie).  We certainly will be buying one (and more!) again.

If you’re in Kenosha, make sure to stop by Oliver’s. And don’t forget the coupon!